
Mercenaries vs. Skorne 25pts.
pMagnus
Nomad
Renegade
Mangler
Buccaneer
Freebooter
Reinholdt Gobber Speculator
eHexeris
Titan Gladiator
Basilisk Krea
Cyclops Savage
Max. Nihilators
Min. Beast Handlers
Aptimus Marketh
As I'm typing this, I just realized I was down a point. For some reason I'm terrible at accounting with eHexeris...
Deployment:
As always, I lost the go first roll.
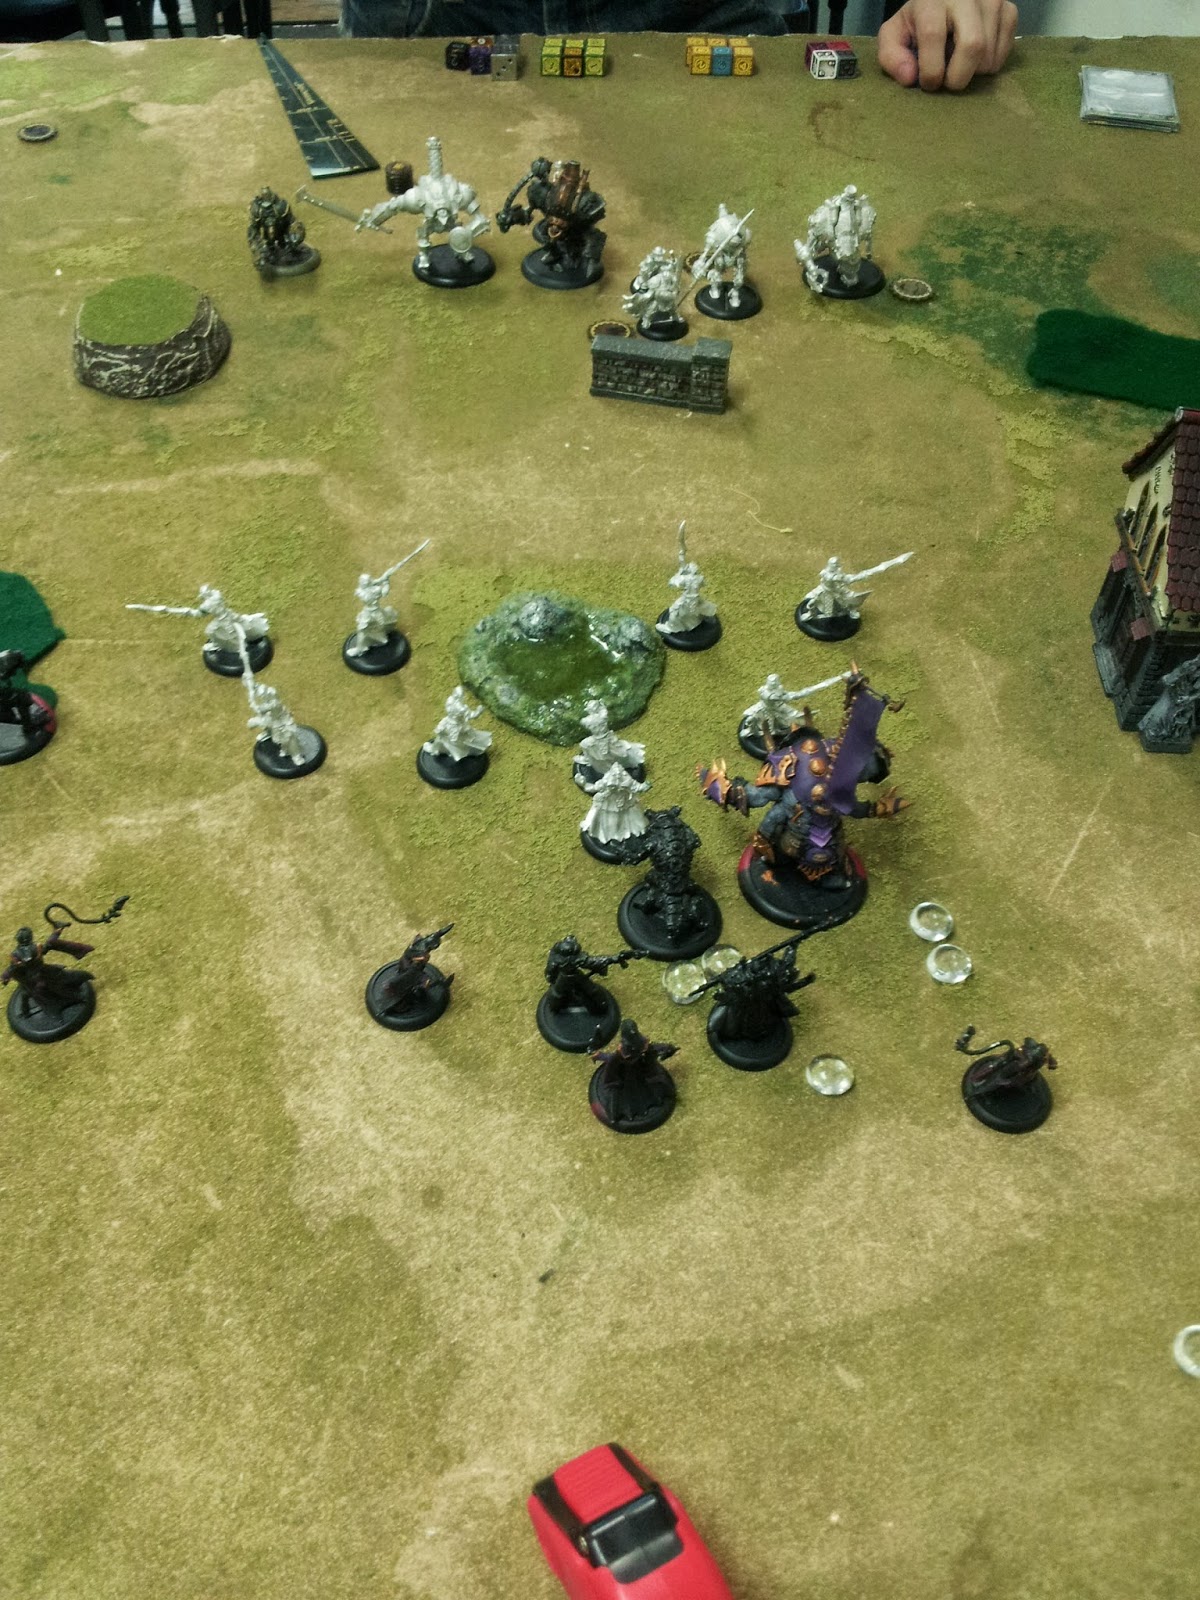
He covered all of his jacks pretty straight forwardly, the light was on my left, pMagnus in the middle, and his heavies near by. I was immediately nervous about all the Knockdown effects that seemed to be everywhere here as I have no real responses to Knockdown.
I set the Nihilators in the front, and was nervous about how I'd move them around the board. The Gladiator is to the right next to the Krea, and the Savage takes left. eHexeris sits in the back of it all, with the Aptimus next to him, and the Paingivers spread out pretty well.
 Turn 1:
He tosses Blur onto pMagnus, Snipe onto the Buccaneer, and runs things forward.
I run my Nihilators up 10" (more or less), and everything runs up. Aptimus tosses Ashen veil onto the Nihilators, and Hexeris tosses Arcane Reckoning on himself as he has nothing to really toss around. Magnus is really well shielded this turn due to the wall, and my offensive spells are out of range.
The Krea has it's Animus up because the less chances I have for him to tie up one of my beasts or my 'lock I can give the better. I leave Hexeris screened Hexeris well, but I left my right flank a little expose, and didn't move my Nihilators up far enough. However, I did get them all in the tiny 7" command bubble, so I made an improvement there.

Turn 2:
He misses on most of his shots that he tosses around, and shuffles around a smidge. He blocks off a charge lane to his caster with his Nomad.
I have the Nihilators run/charge and do their best to block lanes and to try to get to his caster. None of them manage to hit his ridiculous defense through the Cover. Most of them spread around and kind of clog up my Titan.
I managed to still keep Hexeris well protected just by these two light beasts. I upkeep Arcane Reckoning on Hexeris. He had set Reinholdt off to the side and I killed it with a Nihilator which I quickly realized is a waste of time/points. My Savage runs off into the woods to give more control to the left flank.
I quickly realized at this point I should have concentrated more on the right as that is where more of his jacks were. I spread out too far over the course of this game not allowing me to get any holes into him.
 Turn 3:
He has to pop feat to get at my caster, which I take as a compliment to how I kept him hidden. However this means I have to deal with a Freebooter behind my lines who wants to hogtie my caster and toss him onto that rotisserie spit of a spear he has. This causes this next turn to be incredibly flubbed. He also moves over his Buccaneer to knockdown my Titan. Which I'll force back to normal on my turn.
I used my Nihilators terribly so I was wasting 8 points a turn. Anyhow, he popped feat to maneuver his stuff around, and failed to knock down my Titan again. He shielded his caster over on the right side of the field, which left my Cyclops pretty useless, as it had been all game. I have it run across the board to try to block a charge lane.
This next moment is me auto-piloting through, so I have to apologize for the absolutely titanic stupid I was operating on. The Titan tried to slam and was half an inch shy of actually getting the charge benefit on the Buccaneer and I bought a boat load of attacks which did functionally no damage. I couldn't quite figure out how I was going to deal with this thing. What i should have done was used Hexeris to get toe to toe with the jack, along with the Krea. Instead, I had the Aptimus toss down Hellfire on it, have the Krea start hitting it, and then waste piles of fury on Hellfire as he moved into difficult terrain which I thought would have given me cover.
Turn 4:
Since I messed up that turn beautifully, he has me dead to rights. He uses the Obliterator Rocket to knock down my caster, has the Buccaneer kill my Titan, and then has the Free Booter hit me for more attacks then I can transfer to my beasts.
I mismanaged a lot of pieces. I thought that covering the board would be my path to victory, when in fact it's about making a series of strong decisive moves over board presence. I over estimated how much he'd use the pieces he'd have on my left side of the board. I was most of all frantic over how I'd make the Nihilators useful, largely because I underestimated the value of charge attacks at 3d6 - 6 on his heavies.
He used his low model count to force me into the encounters he wanted. I was distracted by pointless pieces and fear of AoEs. I was also scared of the imaginary threat of a deadly trample to my caster. In this match I find that I don't move far enough up the field, and I try to play incredibly conservatively rather than taking risks.
So my big revelation is to take Risks, and invest all your pieces to all capacity without fear. Stupid risks are one thing, but well backed risks are different. I valued my Nihilators and didn't find a use for them due to skepticism and not having the right match up for those pieces in particular.
On a positive note, if I had scooted the Nihilators slightly to the right, I was still good at denying shots to my caster, and will need to walk away with a lesson on how to keep him from being targeted.
No comments:
Post a Comment